Be the first to review this product
EcoStick
Starting At
$8.00
SKU
WALL-ECOSTICK

Production time is shown in business days for orders placed by 1pm Mountain Time. Subject to material availability. For larger quantity orders, contact us for production time.
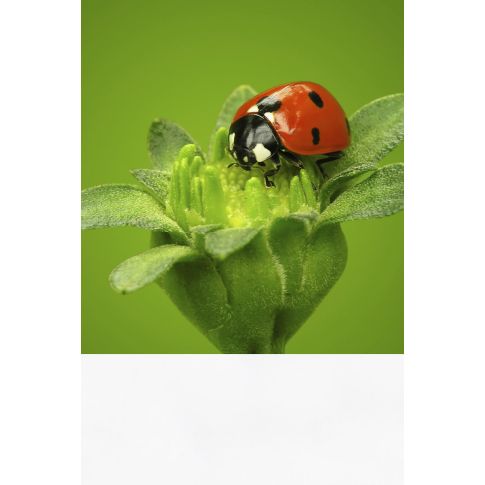
This self adhesive PVC-free mineral-reinforced polyolefin film makes eco-friendly wall graphics and decals that are removable and reusable.
The unique adhesive on this PVC-free mineral-reinforced polyolefin film makes it easy to install on any flat surface including painted walls, and it can easily be removed and reapplied. This makes it a great, eco-friendly material for making removable wall decals, murals, borders, wall decals for children’s rooms, countertop graphics or temporary signage in commercial environments. It provides excellent image quality, is durable, and economically priced. Available in widths up to 54".
Approximate longevity of up to 2 years outdoors or 5-20 years indoors.
Favorite Features
The adhesive is aggressive enough to stick well, even to some uneven surfaces, but as long as the adhesive is kept clean, it can be reapplied as often as necessary. It's thicker than normal adhesive vinyls, so it's easier to apply. It can be applied in cold weather. It's eco-friendly.
Drawbacks
This material is printed with UV inks, which have a thickness that produces a slightly raised print. Because of this, laminates can show some slight air pockets around the edges of color with a big transition from light to dark, such as black text on a white background.
It's not easy to remove large wall murals and reuse them because the panels tend to be so large that it's difficult to remove them without stretching or getting them dirty or folding over on themselves. Like all self adhesive products, when applying to painted surfaces, if the paint does not have good adhesion to the wall, it can pull the paint off when removed. Not only does this make repainting necessary, but also prevents the decal from being reused, so it's best to test walls before applying the material.
Best Applications
Eco-friendly wall murals and wall graphics that are easy to apply and remove, and are reusable if handled properly.
Removable self adhesive products will adhere to most clean, smooth surfaces. Desired results have been achieved on a variety of surfaces including but not limited to drywall, wood paneling, glass, metal, and composite board constructions. These products may not adhere properly to textured surfaces such as textured paints, textured wallpaper, cinder block or brick, outdoor walls, or any surface that is jagged or rough, so testing is required before installing on those surfaces. For best results we recommend dry wall that has been primed and painted (a white semi-gloss paint will promote the best adhesion and ease of removal). Please follow primer or paint instructions for application and optimal curing time prior to installing media. Painted walls that have not been primed are more likely to have the paint removed with the graphic. Testing of the paint adhesion is recommend prior to installation if this is a concern.
Acclimation
Prior to install, the panels should be rolled out flat and allowed to relax and reach room temperature. Recommended room acclimation time is 2 hours.
Surface Preparation
Make sure the surface is clean, smooth, dry, undamaged, free of mold, mildew, grease or stains, and structurally intact. If moisture is present, immediately identify and eliminate the source(s) of the moisture and verify that all wall surfaces are completely dry before proceeding. Any mold or mildew MUST be removed from walls and hanging surfaces prior to installation. Use a warm damp cloth to wipe off any dirt or dust and allow the surface to completely dry prior to installation. Do not use any chemicals to clean the intended surface. These products have been tested on many surfaces and should stick aggressively. They can be repositioned and re-applied as long as the adhesive surface has not been contaminated with dirt, dust, finger prints, etc. Drywall surfaces should be prepared with primer and paint, for best results we recommend a semi-gloss paint. If newly painted allow to dry for 30 days prior to installation.
Air and surface temperatures much be above 20 degrees Fahrenheit.
Installation
Determine the starting point for the graphic. Small images could start from the right or left side, but we recommend larger graphics begin by installing the center panel first. Note: Use care to make sure the panels will cover full height and width of the project area. Some floors and ceilings are not square, so make sure the graphic covers the widest or tallest areas for the project.
Create a plum line on the wall with a pencil to create an edge guide for each panel.
For ease of handling, roll the first panel into a tight roll with printed image rolled inside. Now unroll 6" and peel back the liner paper 6". Cut away the unrolled portion of lining paper to expose the adhesive backing. Using the plum line, carefully align the top of your panel so that it is square from side to side, and the edge matches with your plumb line. Now the 6" that was exposed can be stuck against the wall surface.
With the top of the panel properly adhered to the wall, slowly peel the next foot or so of backing. Try to expose only a few feet of adhesive at a time to prevent unwanted sticking of the lower parts of your graphic. Work you way down the panel using a felt wrapped squeegee to carefully smooth the material onto the wall. We recommend using slow and even pressured side to side strokes, starting from the middle of the panel and moving outward to the sides. Once a few feet of material has been stuck to the wall, it should be possible to allow the remaining portion of the panel to drop to the floor. Now you can simply continue the procedure to easily progress down the wall.
When the entire panel has been positioned properly and smoothed, be sure to press down on the perimeter edge of each individual panel to assure good adhesion at the seams and edges. Any bubbles under the material should come out during the smoothing process. If necessary you can lift the material to release stubborn bubbles or large wrinkles.
Install remaining panels using the same method as above. Panel seams should overlap 1/2" using care to make sure of proper graphic alignment during installation. After all panels are installed, trim perimeter "bleed" around all edges using a sharp utility knife.
Removal should be as simple as pulling down from one corner. These products were designed to cleanly and easily be removed in complete panels. If the wall surface was prepared properly there will be no damage to drywall.
Maintenance
Ordinary dirt and smudges can be removed with a mild soap and warm water. Clean from bottom of wall upward. Rinse thoroughly with clean water from the top down using a sponge. Dry wallcovering with a soft lint free cloth or towel. For more difficult stains that are only surface deep, the use of a stronger detergent is recommended. Always test an inconspicuous area with the stronger detergent to be sure that the surface and ink are not damaged. DO NOT USE steel wool or powdered abrasive because they can damage the image and textured surface. DO NOT USE solvents, alcohol, pine oil, or cleaners that contain these kinds of products as they can remove the image and damage the textured surface. When cleaning, always take measures to prevent water from dripping behind molding.
How wide will each panel of my wall mural be?
Generally we make each panel of a larger wall mural 48 inches wide. If the dimensions of your mural are such that narrower panels are necessary to divide it into equal sections, we may make the panels narrower. For example, if a mural were 80" wide, we might split the mural into two 40" panels, rather than one 48" and one 32" panel. For wallpaper and textured vinyl wallcoverings that require wallpaper paste for installation, we leave a 1"-2" overlap between panels to make alignment and trimming easier. For self adhesive products, we leave a 1/2" overlap since those materials require you leave the overlap between panels rather than double cut and butting the seams.
For smaller murals or graphics, we try to keep the image in one piece if possible.
Should I install my wall mural, or should I hire someone else to do it?
EcoStick is very easy to work with and is very forgiving of mistakes, since it can be removed and reapplied if necessary. For this reason, it should be safe to install yourself without much fear of damaging the mural. Of course, professional installation is always an option. If you hire a wallpaper installer, be sure to let them know this material is self adhesive, as that requires a different installation technique than wallpaper murals that install with paste.
Ratings & Reviews
Ratings & Reviews
Be the first to review this product